

In this article, we will see how we deploy Python application using CircleCI in a few easy steps.
Clone the below repository:
https://github.com/rishabh1cr/CirclCI_Project.git

Insight
There are two .py(python files here)
main.py : This script basically converts a string to uppercase.
```plaintext def to_upper(name): return name.upper()
def say_hello(name):
Use a breakpoint in the code line below to debug your script.
print(f'Hello, {name}') # Press ⌘F8 to toggle the breakpoint.
Press the green button in the gutter to run the script.
if name == 'main': name = 'John' say_hello(name) up = to_upper(name) print(up)
**Detailed Explanation**

This code defines two functions: `to_upper` and `say_hello`, and then executes the `say_hello` function followed by the `to_upper` function.

The `to_upper` function takes a `name` parameter and returns the uppercase version of the string `name` using the `upper()` method.

The `say_hello` function takes a `name` parameter and prints a greeting message using the `print()` function. The message includes the `name` parameter using an f-string, which allows variables to be included directly in the string by wrapping them in curly braces `{}` and prefixing the string with an `f`.

The `if __name__ == '__main__':` block is used to determine whether the script is being run as the main program or being imported as a module into another script. If it's being run as the main program, the block of code inside the if statement will execute. In this case, the name variable is set to `'John'`, and then the `say_hello` function is called with the `name` parameter. After that, the `to_upper` function is called with the `name` parameter, and the resulting string is printed using the `print()` function

1. **tests.py**

    This script is the test case of our Python program.

    ```plaintext
    import unittest
    from main import to_upper


    class MyTestCase(unittest.TestCase):
        def test_to_upper(self):
            name = "John"
            upper_name = to_upper(name)
            self.assertEqual(upper_name, "JOHN")


    if __name__ == '__main__':
        unittest.main()
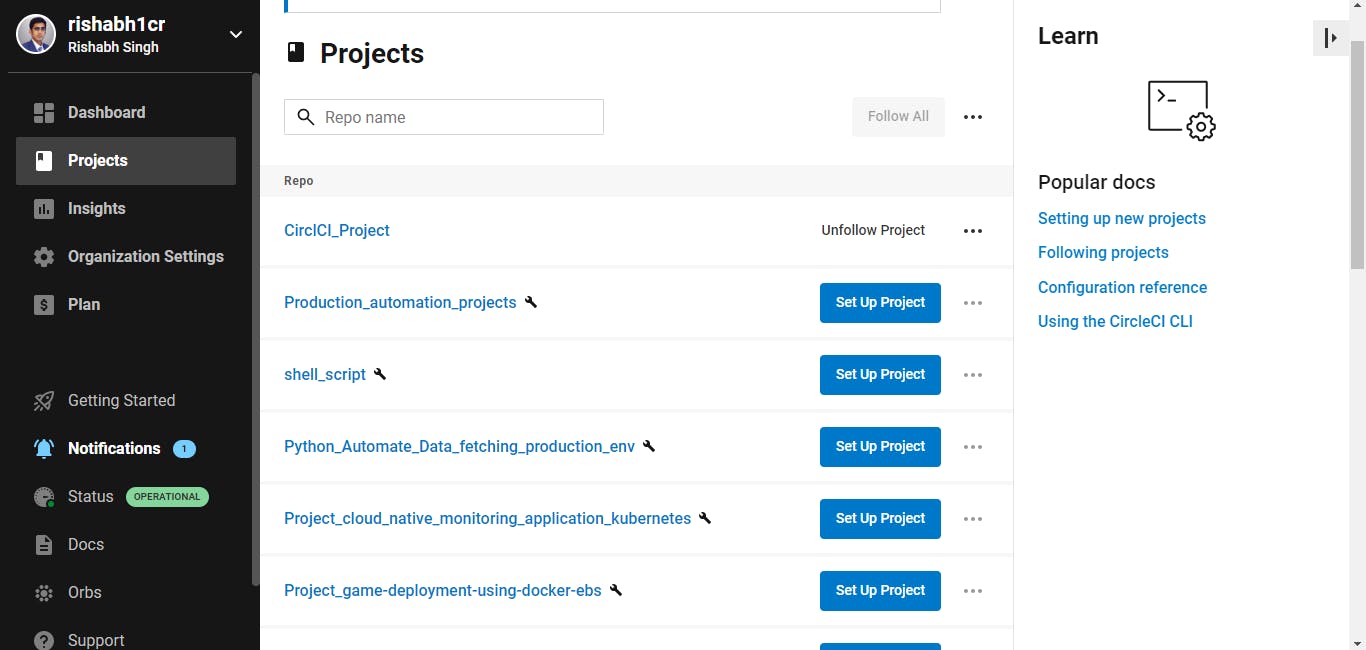
Signup/Login to CircleCI
Now Login/Signup to CircleCI using your GitHub account and all your repository will be seen in the dashboard.
URL : https://circleci.com/
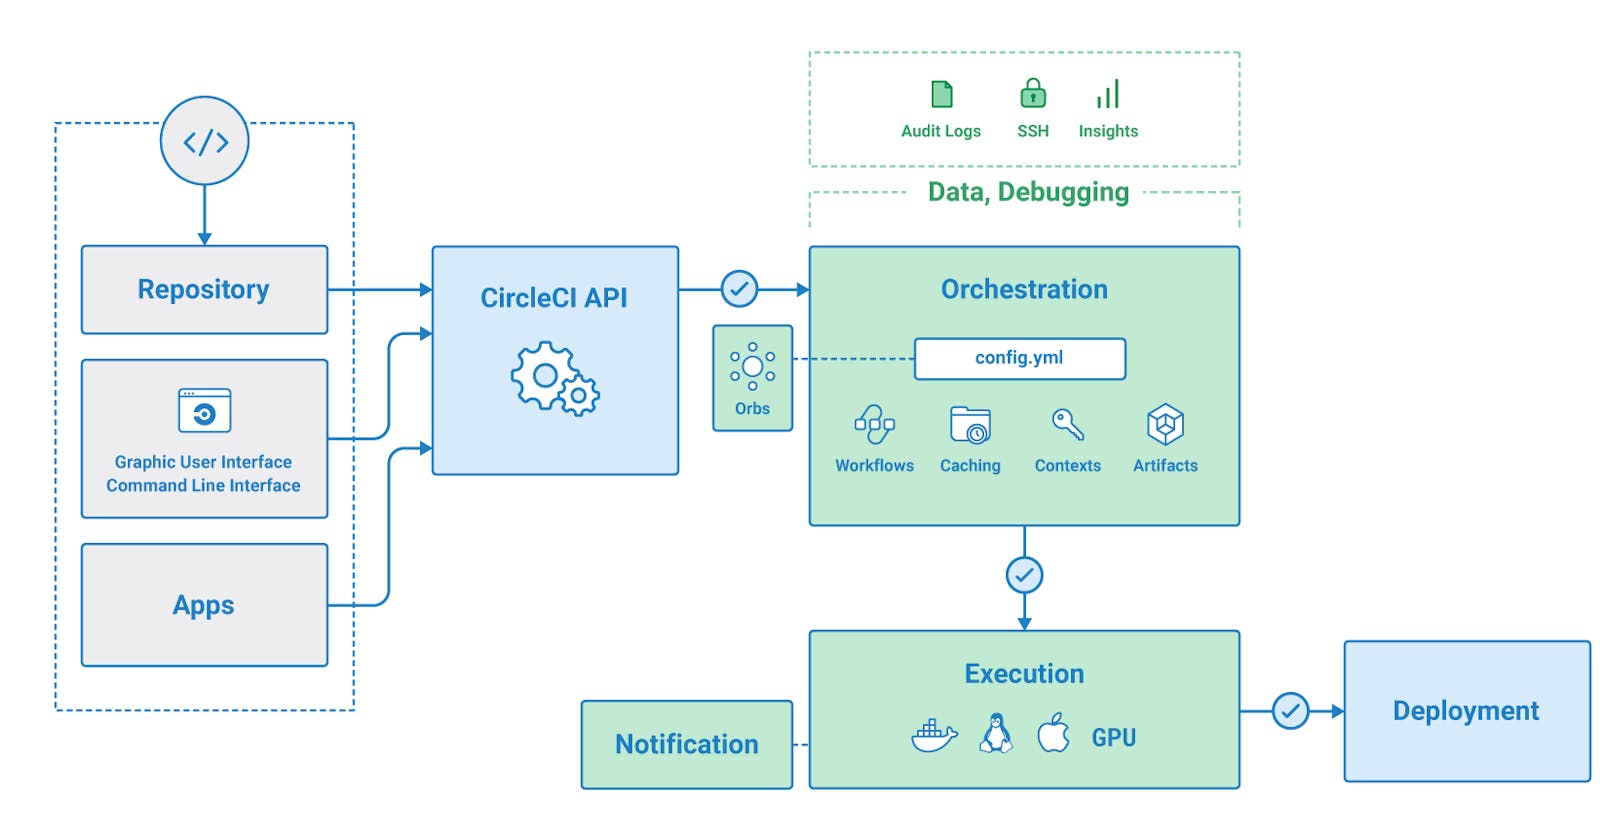
You will notice there is "Setup Project" option which basically needs a config.yml file for CircleCI to read and run the pipeline.
Creating Config.yml file
Now let's write the config file for our application.
CircleCI will read the config.yml file under the .circleci folder. This folder will contain all the configurations.
Our config.yml file :
version: 2.1

jobs:
  build:
    docker:
      - image: cimg/python:3.11
    steps:
      - checkout
      - run: python main.py
  test:
    docker:
      - image: cimg/python:3.11
    steps:
      - checkout
      - run: python tests.py
  deploy:
    docker:
      - image: cimg/python:3.11
    steps:
      - run: echo "Deploying to production server"

workflows:
  build_and_test_deploy:
    jobs:
      - build
      - test:
          requires:
            - build
      - deploy:
          requires:
            - test
          filters:
            branches:
              only: master
Code Insight
This code is a configuration file written in YAML format for a CI/CD pipeline using CircleCI.
The file specifies three jobs: build, test, and deploy, each of which runs in a separate Docker container based on the cimg/python:3.11 image.
The build job checks out the source code repository and runs a Python script called main.py.
The test job checks out the source code repository and runs a Python test suite called tests.py.
The deploy job runs a command to echo a message indicating that the application is being deployed to a production server.
The workflows section defines a workflow called build_and_test_deploy, which runs the build, test, and deploy jobs in sequence. The test job requires the build job to have completed successfully, and the deploy job requires the test job to have completed successfully and that the branch is master.
Setup Project on CircleCI
Now push the changes on GitHub and open the CircleCI dashboard, and click on "setup project"
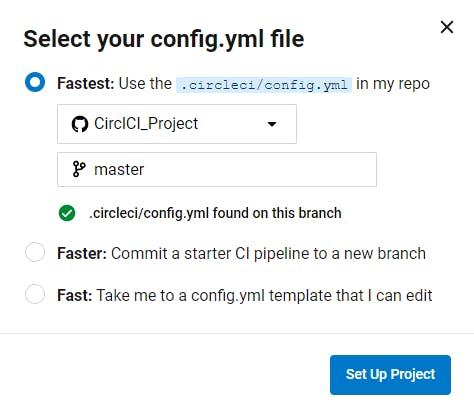
Select our repository and the branch and click on Setup Project.
Notice it will automatically run the pipeline and all our stages will be executed.

Summary
In this article, we have seen how to use CircleCI to deploy application using a few easy steps and we have also seen how to write the config file and code insight for the same.